 Recap Studio
Cursor and click effects
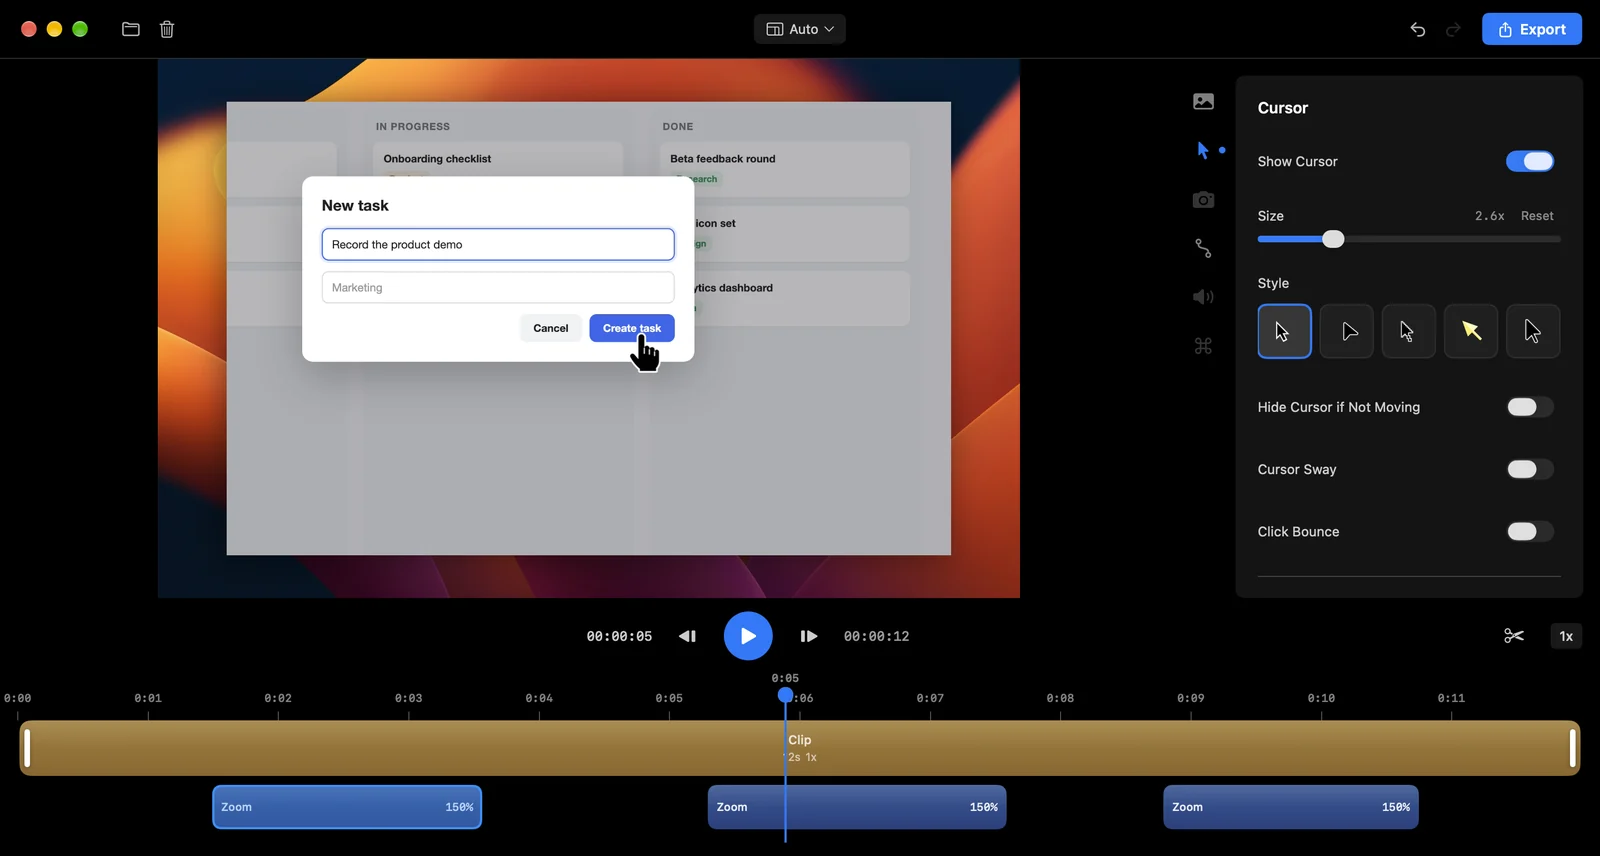
Recap Studio records your cursor’s movement separately from the screen, so you can change how it looks after you’ve recorded. Open the Cursor panel with the arrow icon in the sidebar.
Cursor effects need the Accessibility permission while you record. Without it, the real cursor is part of the video and can't be changed.
Size and style
- Show Cursor: turn the cursor off completely.
- Size: from 1x to 8x. Around 2x to 3x works well for most videos.
- Style: pick one of 7 cursor styles. The pointer switches to a sharp I-beam over text and a hand over links, as it does on your Mac.
Movement
- Cursor animation style (in the Animation panel): Smooth, Medium, Rapid or None. Smooth turns shaky hand movement into a steady glide.
- Hide Cursor if Not Moving: the cursor fades out after it rests for Hide After seconds, and comes back when it moves.
- Cursor Sway and Click Bounce: small animations that make the cursor feel more natural.
- Stop cursor movement at the end of the video: holds the cursor still for the last few seconds, so viewers don’t see you reaching for the stop button.
Click effects
- Click Effect: Circle, Ripple or None.
- Effect Color, Effect Size, Effect Opacity and Effect Duration fine-tune it.
- Click Sound: add a soft click with every click: Magic Mouse or MX Master, with its own Volume. Use the play button to preview it.
To hide the cursor in only part of the video, select that clip on the timeline and turn on Hide Cursor. See Trim, cut and speed up.