 Recap Studio
Auto zoom and editing zooms
Zooms make the important part of the screen big enough to read. Recap Studio can add them for you, and every zoom stays fully editable.
How auto zoom works
When a recording finishes, Recap Studio adds zooms around your clicks and the places where your cursor comes to rest. Close moments are merged into one zoom, and zooms never cover most of the video, so it doesn’t feel like it’s constantly zooming.
- Auto zooms start at a 150% zoom level.
- One Undo (⌘ Z) removes all of them at once if you’d rather start from scratch.
- Turn it off in Recording settings with Create zooms automatically. It only applies to new recordings; existing projects aren’t changed.
Add a zoom
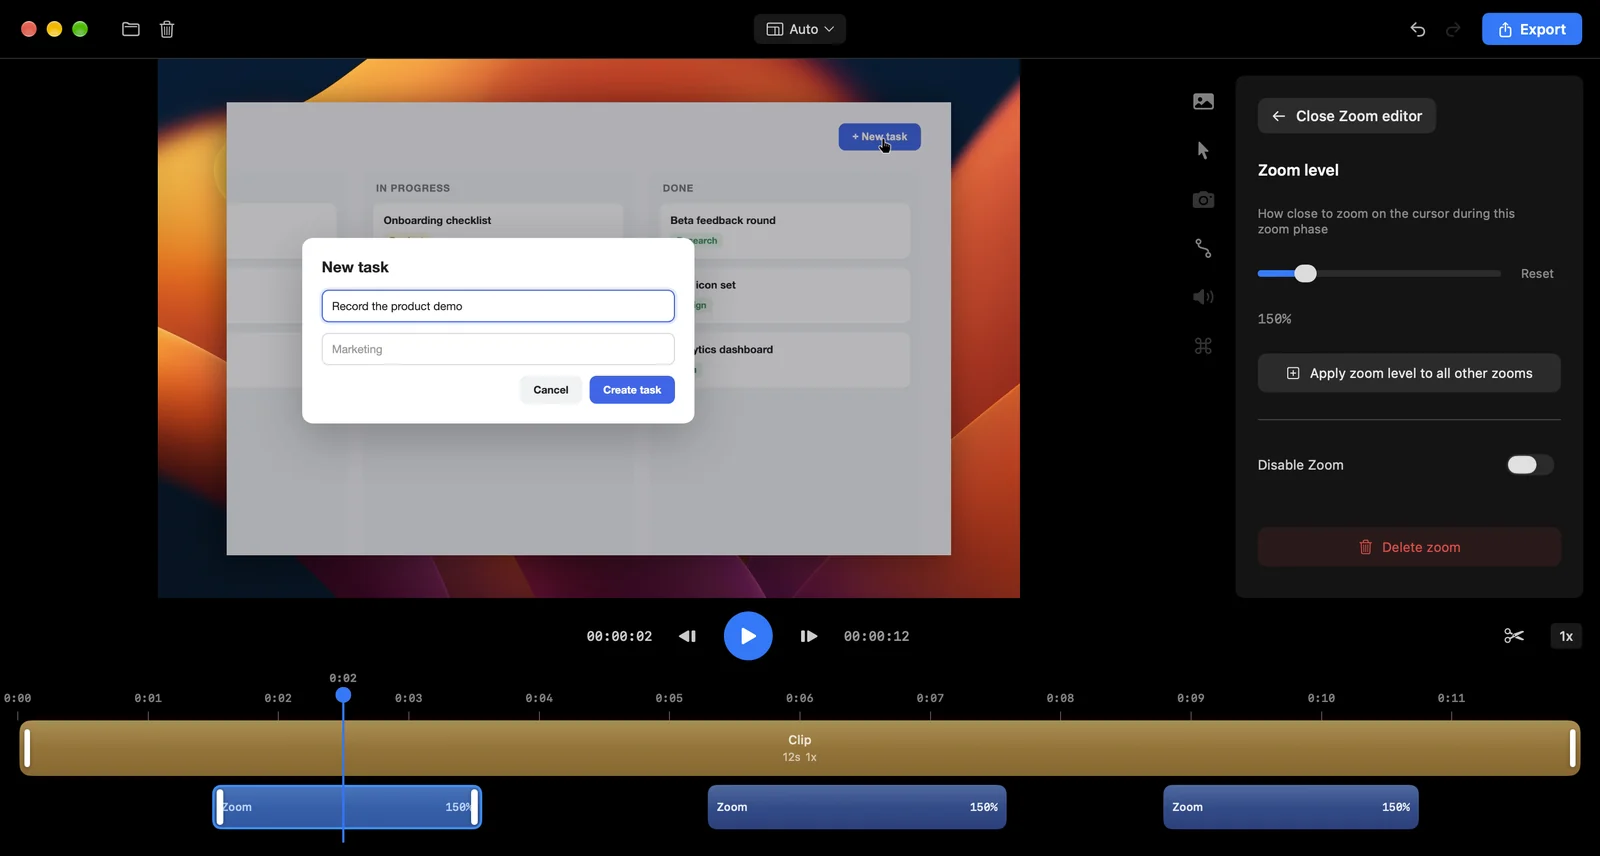
Click an empty spot in the zoom row, under the clip on the timeline. A new zoom appears at that point. If there isn’t enough room before the next zoom, nothing is added.
Move, resize and change a zoom
- Select a zoom by clicking it.
- Move it by dragging its body.
- Make it longer or shorter by dragging its left or right edge.
With a zoom selected, the panel on the right shows:
- Zoom level: how close to zoom, from 100% to 400%. Reset goes back to 150%.
- Apply zoom level to all other zooms: copy this level to every zoom.
- Disable Zoom: keep the zoom on the timeline but don’t zoom. Its percentage is crossed out.
- Delete zoom: remove it. You can also press Delete.
Click Close Zoom editor to go back to the other settings.
Zooms follow your edits
When you cut or speed up clips, zooms stay on the same moment of your recording, so you don’t have to move them again.
Zoom feel
The Animation panel (the curved-line icon in the sidebar) sets how zooms move:
- Focused (default): follows the cursor precisely. Great for tutorials.
- Smooth: more fluid. Better for creative videos that aren’t about reading the screen.